Devops Tutorial
개요
이전 도커 이미지 빌드, 컨테이너 실행, AWS codebuild 도커 빌드 자동화에 이어서 AWS CodePipeline, AWS ElasticBeanstalk 를 이용해 웹 어플리케이션 배포하기
AWS CodePipeline 공식 사이트 https://ap-northeast-2.console.aws.amazon.com/codepipeline/home?region=ap-northeast-2#/welcome
AWS ElasticBeanstalk 공식 사이트 https://ap-northeast-2.console.aws.amazon.com/elasticbeanstalk/home?region=ap-northeast-2#/welcome
AWS ElasticBeanstalk 생성
Create Application
-
Application Name
-
Platform: Docker, Platform Branch: Docker running…Amazon Linux 2, Platform version: Recommended
-
Application Code: Sample application
buildspec.yml 내용 추가
기존 buildspec.yml 밑에
    - printf '{"AWSEBDockerrunVersion":"1","Image":{"Name":"%s"},"Ports":[{"ContainerPort":"5000"}]}' $IMAGE_REPO_NAME:$TAG_VERSION > Dockerrun.aws.json
artifacts:
    files: Dockerrun.aws.json
추가
buildspec.yml
version: 0.2

phases:
  pre_build:
    commands:
      - echo Logging in to Docker Hub...
      - docker login -u $DOCKERHUB_USER -p $DOCKERHUB_PW
      - TAG="$(echo $CODEBUILD_RESOLVED_SOURCE_VERSION | head -c 8)"
  build:
    commands:
      - echo Build started on `date`
      - echo Building the Docker image...
      - docker build -t $IMAGE_REPO_NAME:$TAG_VERSION .
      - docker tag $IMAGE_REPO_NAME:$TAG_VERSION $IMAGE_REPO_NAME:$TAG
  post_build:
    commands:
      - echo Build completed on `date`
      - echo Pushing the Docker image...
      - docker push $IMAGE_REPO_NAME:$TAG_VERSION
      - echo Writing image definitions file...
      - printf '{"AWSEBDockerrunVersion":"1","Image":{"Name":"%s"},"Ports":[{"ContainerPort":"5000"}]}' $IMAGE_REPO_NAME:$TAG_VERSION > Dockerrun.aws.json
artifacts:
    files: Dockerrun.aws.json
https://github.com/yonghanJu/DevopsTutorial/blob/master/buildspec.yml
겪었던 오류(포트 수정)
Dockerfile을 보면 포트를 따로 지정해 주지 않고 기본 포트를 사용했기 때문에 포트를 Buildspec.yml에 추가한 포트를 8000에서 5000으로 수정해 주었다. 각자 자신에 맞는 포트 설정 필요.
Set up AWS CodePipeline
AWS CodePipeline에 들어가 아래 내용 진행
파이프라인 생성
-
파이프라인 이름 작성
-
Service Role: New Service Role
-
Role Name:
AWSCodePipelineServiceRole-ap-northeast-2-[Pipeline Name]
Source Stage
-
소스: Github(Version 1), 내 GitHub 계정의 리포지토리
-
Github v1
-
Repository, Branch: 본인의 Repo의 원하는 branch
-
Detection option: GitHub Webhook(recommended)
Build Stage
이전 포스팅에서 만들었던 codebuild 선택
Deploy Stage
-
Provider: AWS Elastic Beanstalk
-
Application Name, Environment Name: 위에서 buildspec.yml에 추가한 EB 정보
Pipeline 작동 확인
별도의 Branch를 만들어 코드 변경 후 main branch로 PR 수행.
https://ap-northeast-2.console.aws.amazon.com/codesuite/codepipeline/pipelines
Pipeline 도구가 변경 사항을 인지하여 자동으로 빌드/배포가 수행 되는지 확인

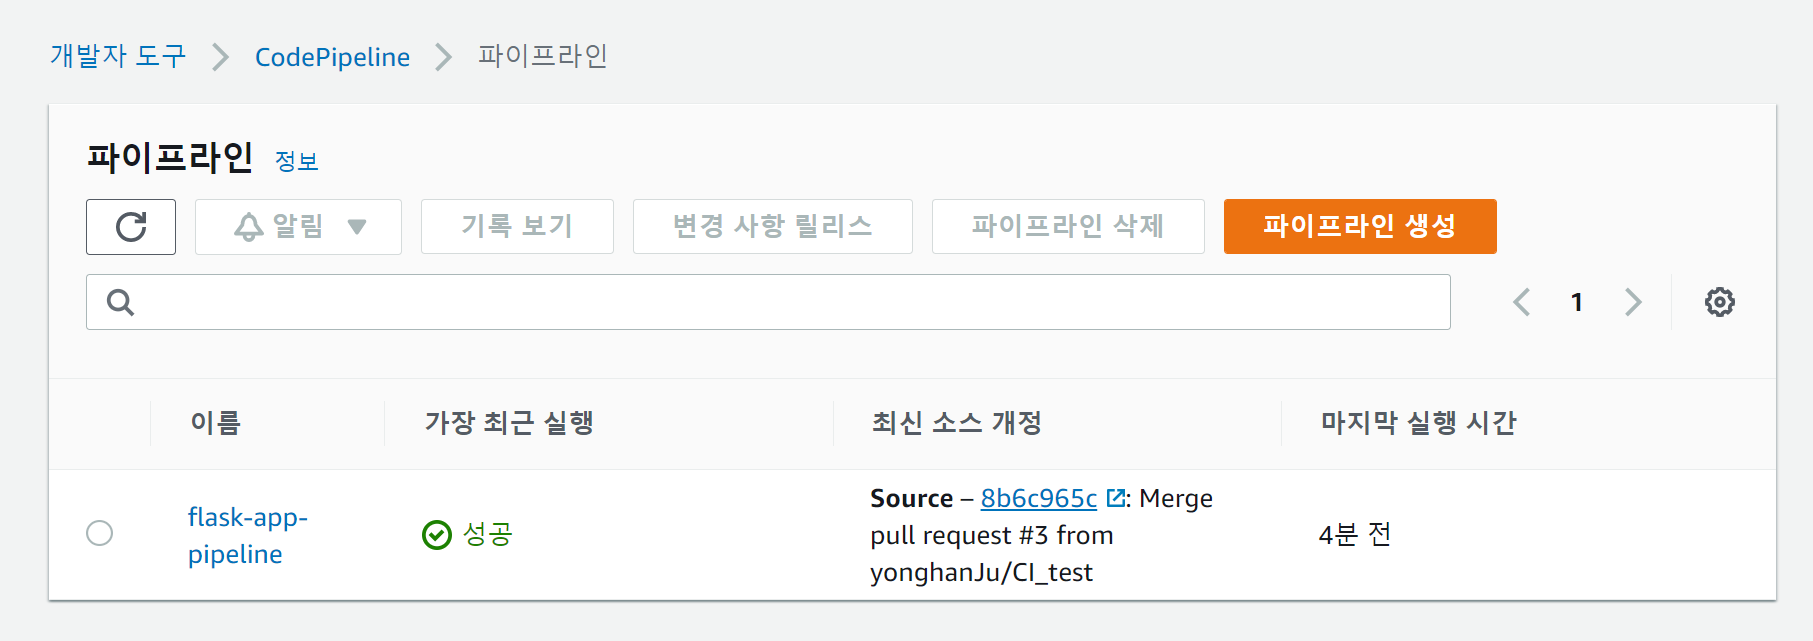
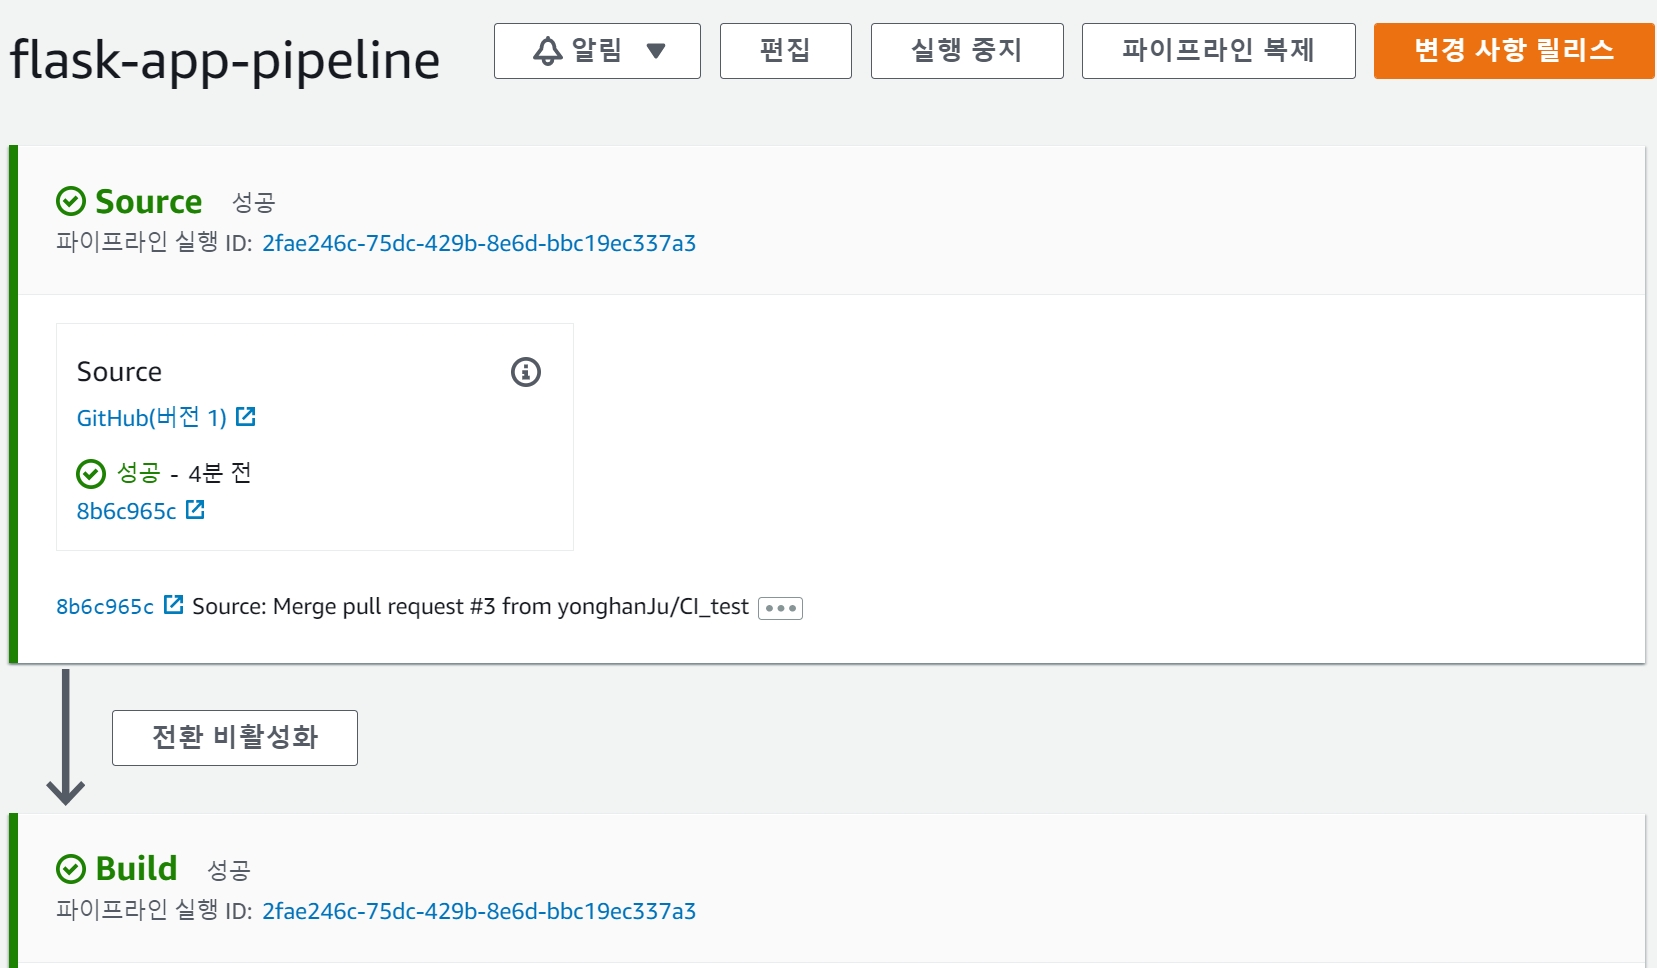
code pipeline에서 CI_test branch로 부터 Pull Request를 감지
source(github)에 변화 감지 (webhook) -> build(AWS codebuild, Docker)

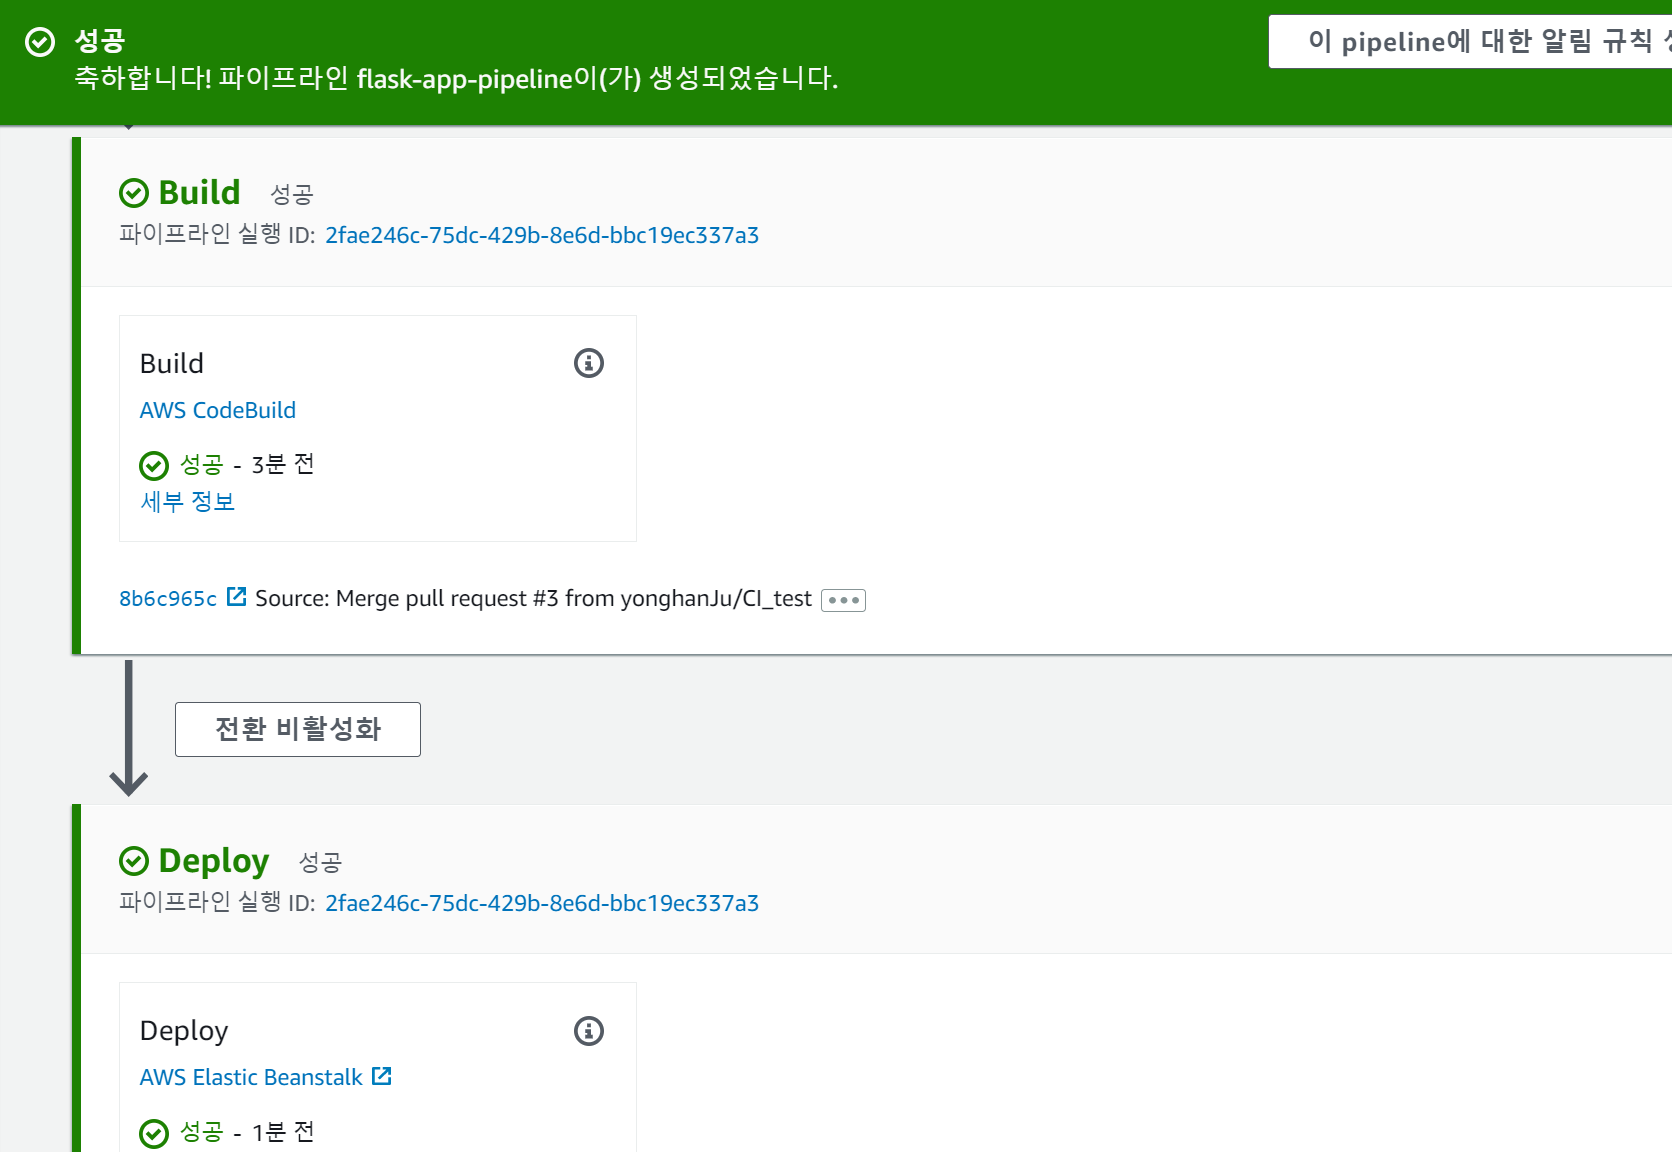
build(AWS codebuild, Docker) -> Deploy(AWS ElasticBeanstalk)

코드 변경 사항이 잘 적용, 배포 되었다면 성공적!